
Advanced
Editing Test Cases in OopsBot
Learn how to edit generated test cases in OopsBot, review details under Recent Test Case, and save changes for accurate QA coverage.
Editing Test Cases
After generating test cases, OopsBot allows you to review and refine them before finalizing. This ensures your test cases are tailored to your project requirements.
Step 1: Token Confirmation
After clicking Generate Selected, a token consumption pop-up will appear.
Confirm to proceed with generation.

Step 2: Access Recent Test Cases
Once generated, your test cases will appear under the Recent Test Case tab.
Hover over a test case to preview its details (Title, Steps, Expected Result).

Step 3: Edit a Test Case
Click the Edit button on a test case.
Update fields such as:
Title
Steps/Description
Expected Result
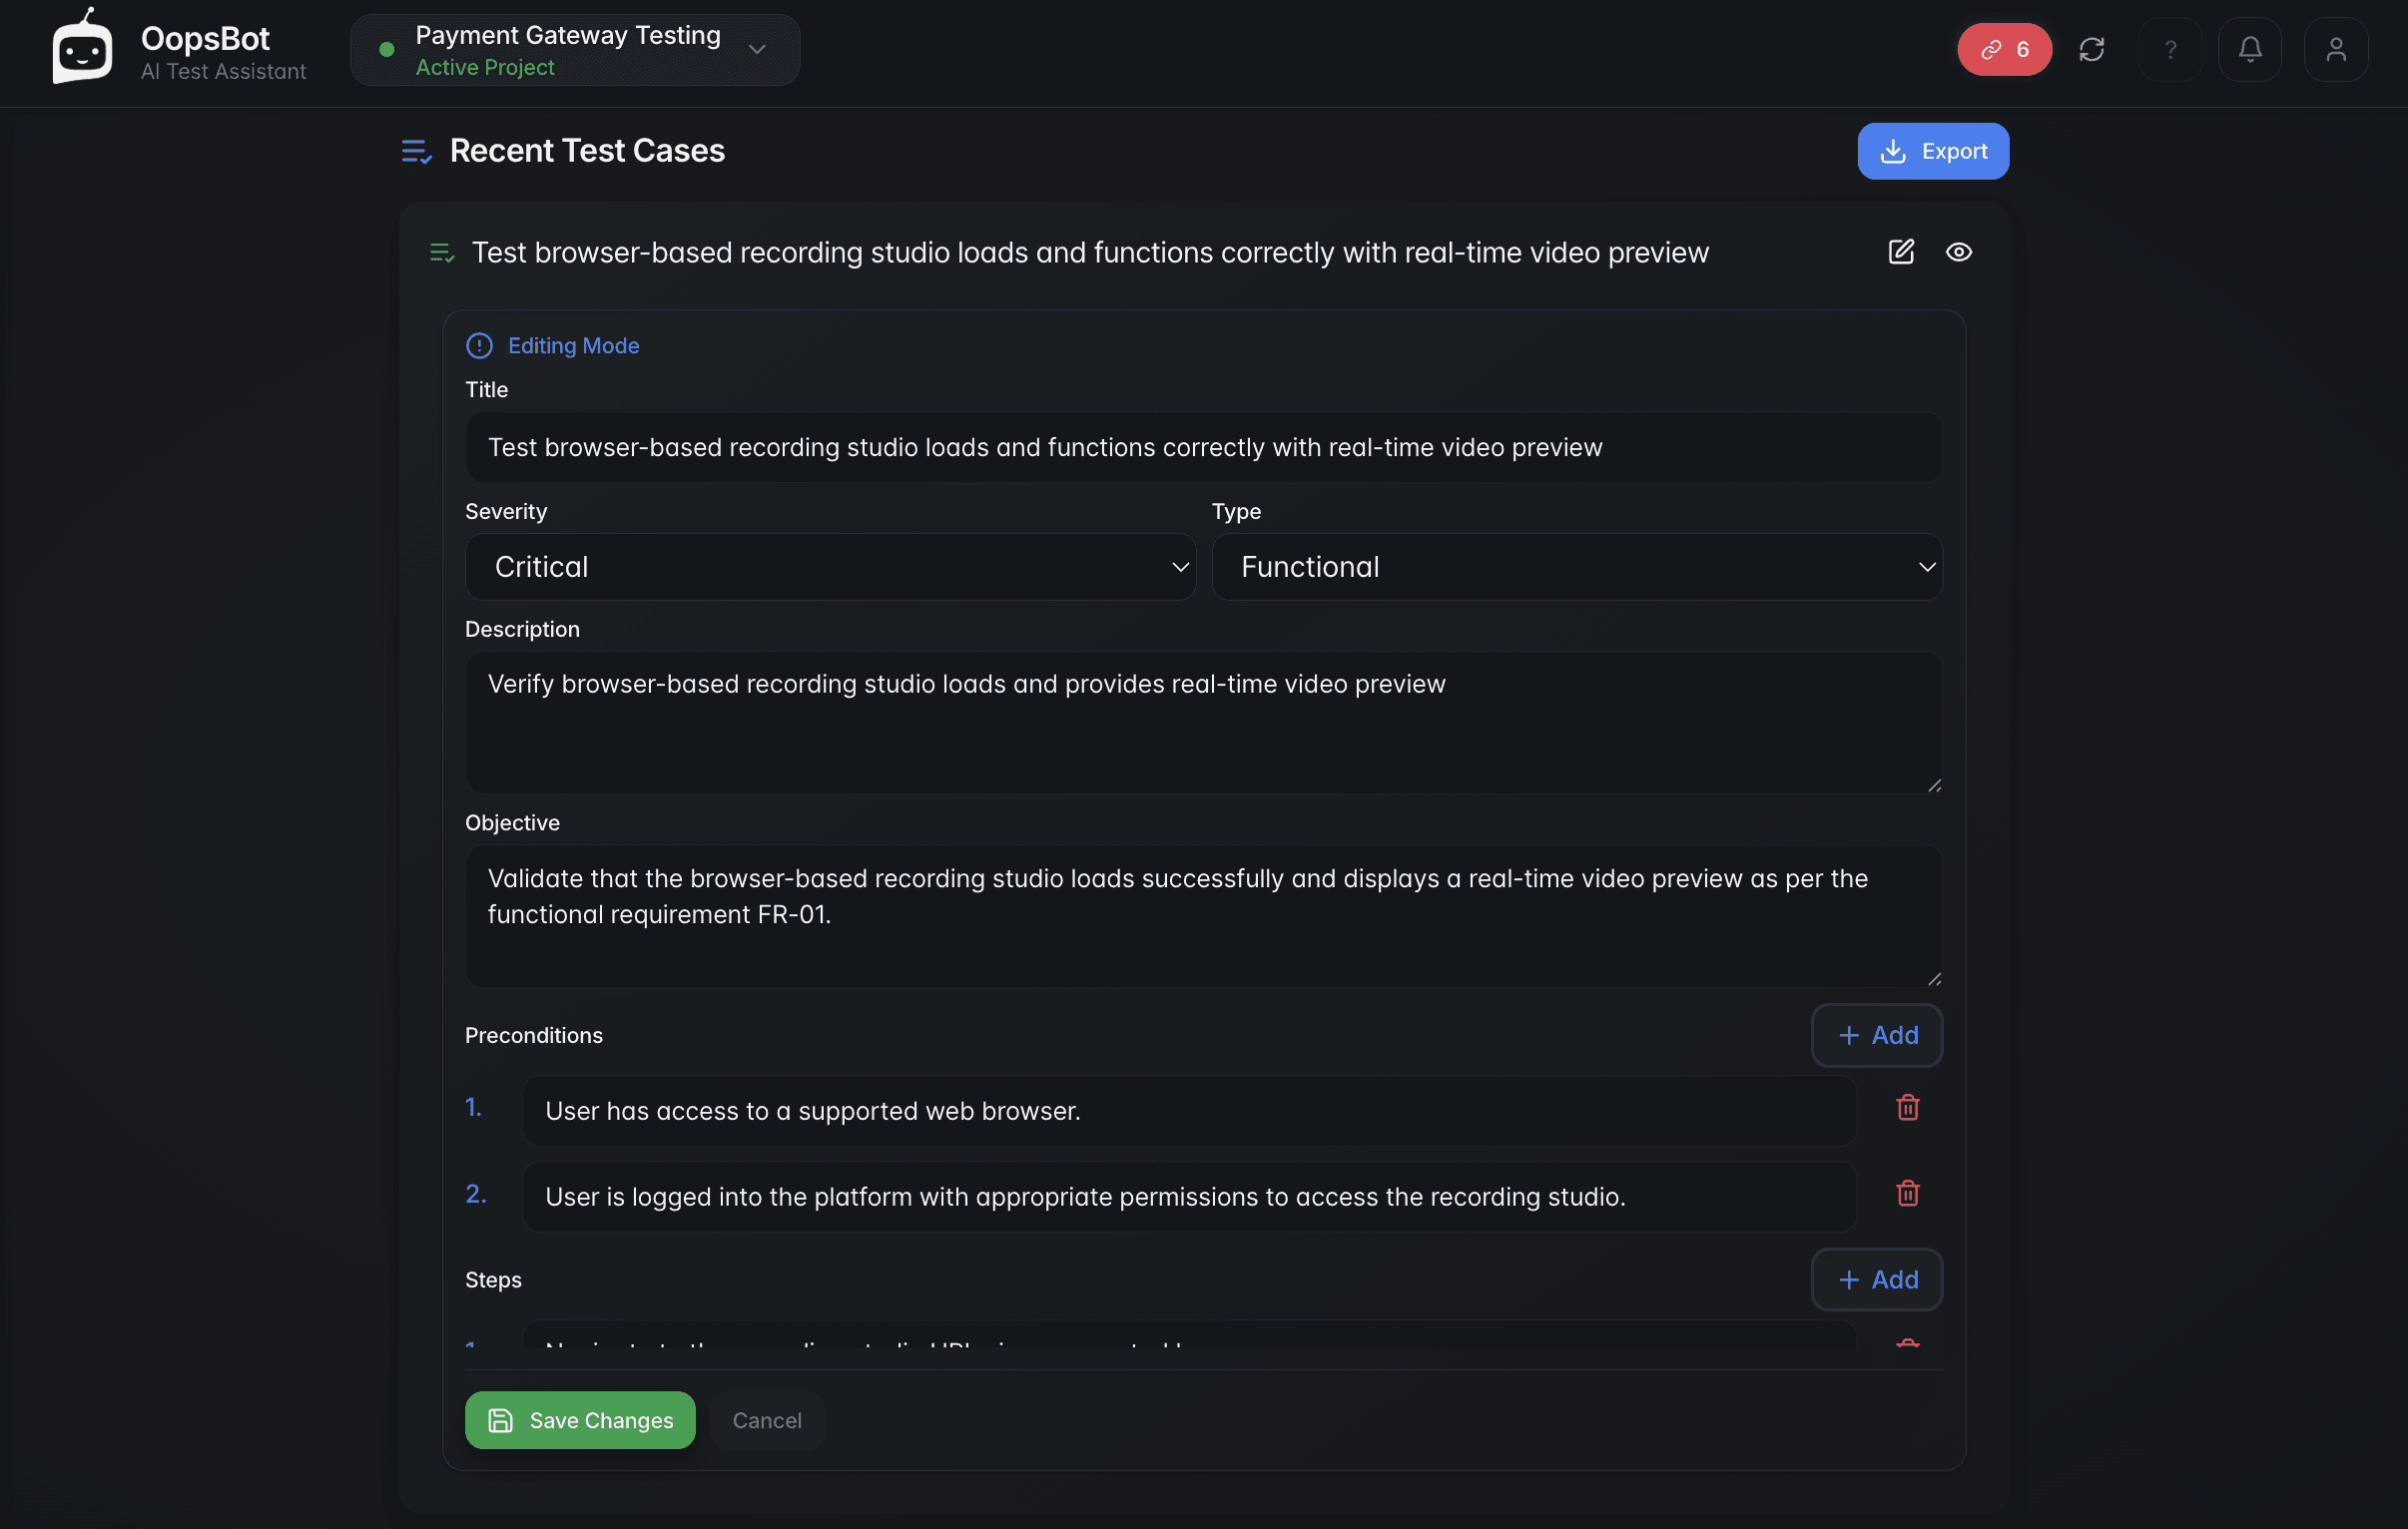
Step 4: Save Changes
Once satisfied, click Save Changes.
Your edited test case will be updated and stored in the project.
Step 5: Generate More Test Cases (Optional)
If you need additional coverage, return to the generated titles list.
Select more titles and click Generate Selected to create additional test cases.
Why Edit Test Cases?
Accuracy: Ensure test cases reflect the latest requirements.
Customization: Adapt generated cases to your QA process.
Flexibility: Expand coverage by generating more cases anytime.
Any other questions? Get in touch